
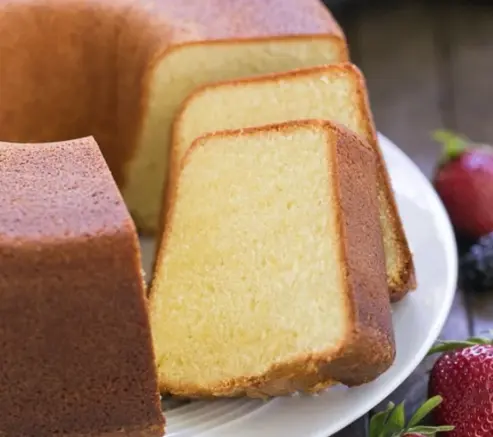
Imagine a slice of golden pound cake resting on your plate. Dense yet fluffy, with a rich buttery flavor that melts in your mouth – this classic dessert has captivated bakers and dessert lovers for centuries. The two-step pound cake, named for its delightfully simple method, offers the perfect balance of ease and elegance. No fancy equipment or complicated techniques are required – just a few basic ingredients and a love for baking.
This comprehensive guide unlocks the secrets to creating a perfect two-step pound cake from scratch. Forget store-bought versions – with a little know-how, you can become a master of this timeless dessert. We’ll delve into every aspect of the process, from the importance of using room temperature ingredients to exploring exciting flavor variations. By the end of this journey, you’ll be well-equipped to bake a two-step pound cake that is not only delicious but also a testament to your baking skills.
Beyond Convenience: The Allure of Baking from Scratch
While readily available store-bought pound cakes offer a quick fix, there’s something truly special about baking your own. The process itself is therapeutic, the aroma of baking cake filling your kitchen, and the satisfaction of creating a delicious dessert from scratch is unmatched. Furthermore, baking from scratch allows you to control the quality of ingredients, ensuring freshness and avoiding unwanted preservatives or additives.
For a deeper understanding of the history and science behind pound cakes, refer to this comprehensive guide from King Arthur Baking All About Pound Cake: https://www.kingarthurbaking.com/recipes/king-arthurs-original-pound-cake-recipe
Demystifying the “Two Steps”: A Breakdown of the Process
The beauty of the two-step pound cake lies in its simplicity. Unlike many complex cakes, this recipe requires just two main steps: layering the dry ingredients and then layering the wet ingredients in a mixing bowl.
Step 1: Layering the Dry Ingredients
Begin by gathering your ingredients: all-purpose flour, granulated sugar, baking powder, and a pinch of salt. Sifting the dry ingredients is not always necessary, but it can help to aerate the flour and create a lighter cake. However, if you choose to skip sifting, ensure you whisk the dry ingredients together thoroughly to break up any lumps.
Importance of Room Temperature Ingredients:
Room temperature ingredients are crucial for achieving a smooth and even batter. Cold butter can lead to a lumpy cake, while cold eggs can prevent proper emulsification (blending of fat and liquids). Here are some tips for ensuring your ingredients are at room temperature:
* Take the butter out of the refrigerator about 30 minutes before baking. It should be soft but not mushy.
* Eggs can be brought to room temperature by placing them in a bowl of warm water for 10-15 minutes.
Step 2: Layering the Wet Ingredients
In a separate bowl, cream together the softened butter and sugar until light and fluffy. This step incorporates air into the batter, contributing to the cake’s rise.
Beat the eggs one at a time, incorporating each egg fully before adding the next. Then, add the vanilla extract and any additional flavorings according to your chosen variation (discussed later).
Mixing Techniques:
Once the wet ingredients are combined, gradually add the dry ingredients to the wet mixture in batches, alternating with the milk. Mix on low speed just until the ingredients are combined. Overmixing can lead to a tough and dense cake.
Choosing Your Pan: Selecting the Perfect Vessel
The type of pan you choose will affect the shape and baking time of your two-step pound cake. Here are the most popular options:
- Loaf Pan: The classic choice, offering a rectangular shape perfect for slicing. A standard loaf pan is typically 9×5 inches.
- Bundt Pan: This pan creates a beautiful and decorative cake with a fluted design. Bundt pans come in various sizes, so choose one that holds at least 8 cups of batter.
- Angel Food Cake Pan: This pan provides a tall and elegant cake due to its center tube. While not the most traditional choice for pound cakes, it can be used for a unique presentation. Keep in mind that angel food cake pans are typically larger, so you may need to adjust the baking time accordingly.
Greasing and Flouring the Pan:
No matter which pan you choose, ensure you properly grease and flour it to prevent sticking and ensure easy removal of the cake. Here’s how to do
Here’s how to properly grease and flour your pan:
- Grease the pan generously with softened butter or cooking spray.
- Dust the pan with flour. Coat the entire greased surface, tapping out any excess flour.
For an extra layer of non-stick insurance, you can also try this trick: after greasing the pan, coat it with a thin layer of cocoa powder or finely ground nuts before adding the batter.
Baking to Perfection: Mastering the Oven
Preheating the Oven:
Before you begin mixing your batter, preheat your oven to the recommended temperature in your recipe (typically around 325°F or 165°C). Maintaining a consistent oven temperature is crucial for even baking.
Baking Time and Temperature Variations:
The baking time for your two-step pound cake will vary depending on the size and type of pan you use.
- Loaf Pan: Typically bakes for 55-65 minutes.
- Bundt Pan: Due to its larger size and thicker center, a Bundt cake may require 65-75 minutes of baking.
- Angel Food Cake Pan: Since this pan is taller, baking time might be closer to 70-80 minutes.
Signs of Doneness:
How do you know when your two-step pound cake is done? Here are two reliable indicators:
- A toothpick inserted into the center comes out clean. Insert the toothpick into the thickest part of the cake, avoiding the edges. If the toothpick comes out with moist crumbs, the cake needs more baking time.
- The cake starts to pull away from the sides of the pan. Gently nudge the pan – if the cake is done, it will move slightly away from the edges.
Cooling Techniques:
Once your cake is done, allow it to cool in the pan for about 10 minutes before transferring it to a wire rack to cool completely. Leaving the cake in the pan for a short while allows it to set before being moved. A wire rack allows air to circulate around the cake, promoting even cooling and preventing the bottom from becoming soggy.
FAQs: All Your Two-Step Pound Cake Questions Answered
Here are some of the most frequently asked questions regarding the two-step pound cake:
- Can I use a stand mixer for this recipe?
Absolutely! A stand mixer can be a helpful tool for creaming together the butter and sugar, as well as mixing the dry and wet ingredients. However, use it on low speed to avoid overmixing the batter.
- My cake didn’t rise properly, what went wrong?
There are a few possible reasons why your cake might not have risen properly:
* **Using cold ingredients:** As mentioned earlier, room temperature ingredients are crucial for proper leavening (rising).
* **Overmixing the batter:** Overmixing can develop the gluten in the flour, leading to a dense and tough cake.
* **Incorrect oven temperature:** An oven that is too hot can cause the cake to rise too quickly and then collapse, while an oven that is too cool can prevent the cake from rising adequately.
- My cake is too brown on top, how can I prevent this?
If you notice the top of your cake browning too quickly during baking, you can try a few things:
* **Reduce the baking temperature slightly.** Lowering the temperature by 25°F (10°C) can help prevent excessive browning.
* **Cover the top of the cake loosely with aluminum foil.** This will create a barrier and slow down the browning process. Check the cake for doneness underneath the foil.
- Can I add nuts, fruits, or other flavors to the recipe?
The beauty of the two-step pound cake lies in its versatility. You can definitely explore various flavor and texture variations! Here are some ideas:
* **Nuts:** Chopped almonds, pecans, or walnuts can be added to the batter for a delightful crunch.
* **Fruits:**  Fresh or dried fruits like blueberries, chopped cherries, or dried cranberries can add pops of flavor and moisture.
* **Citrus Zest:**  A teaspoon of orange or lemon zest can brighten up the flavor profile.
* **Chocolate Chips:**  For a decadent twist, fold in some semisweet or dark chocolate chips into the batter.
These are just a few ideas to get you started. Feel free to experiment and create your own signature two-step pound cake flavor combinations!
- How can I store leftover pound cake?
Store leftover pound cake in an airtight container at room temperature for up to 3 days
For longer storage, wrap the cooled cake tightly in plastic wrap and then again in aluminum foil. Properly wrapped, a two-step pound cake can be frozen for up to 3 months. Thaw the cake in the refrigerator overnight before serving.
Glazes and Drizzles: The Finishing Touches
A simple glaze or drizzle can elevate your two-step pound cake from delicious to visually stunning. Here are some easy glaze options to consider:
- Classic Powdered Sugar Glaze: Whisk together powdered sugar, milk, and a touch of vanilla extract until smooth. The consistency should be thin enough to drizzle but thick enough to coat the cake.
- Lemon Glaze: For a bright and citrusy twist, add freshly squeezed lemon juice and zest to the powdered sugar glaze recipe.
- Chocolate Glaze: Melt chocolate chips or chopped chocolate with a little bit of butter or milk in a microwave-safe bowl until smooth. Let the glaze cool slightly before drizzling over the cake.
Techniques for Applying Glazes:
Once you’ve chosen your glaze, there are a few ways to apply it to your cake:
- Drizzle: Slowly pour the glaze over the top of the cooled cake, allowing it to drip down the sides.
- Spoon: Spoon the glaze over the cake in sections, spreading it gently with a spoon or offset spatula for a smoother finish.
- Dipping: For a thicker glaze coating, briefly dip the top of the cooled cake into the glaze, letting the excess drip back off before placing it on a wire rack to set.
Flavor Variations: A World of Possibilities
The two-step pound cake is a blank canvas waiting for your creative touch. Explore a variety of flavor combinations to personalize your dessert:
Classic Variations:
- Vanilla Bean Pound Cake: Elevate the vanilla flavor by using a vanilla bean instead of extract. Scrape the seeds from the vanilla bean pod and add them to the batter along with the pod itself. Remove the pod before baking.
- Lemon Pound Cake: Zest and juice of a lemon add a refreshing citrusy twist to the classic recipe.
- Orange Pound Cake: Similar to lemon pound cake, orange zest and juice can be used to create a vibrant orange flavor.
Nutty Delights:
- Almond Pound Cake: Finely chopped almonds or almond flour can be incorporated into the batter for a nutty flavor and texture.
- Pecan Pound Cake: Pecan lovers can substitute chopped pecans for some or all of the all-purpose flour in the recipe.
- Walnut Pound Cake: Walnuts add a rich and slightly earthy flavor to the cake. Consider toasting the walnuts for an extra layer of complexity.
Chocolate Twists:
- Chocolate Chip Pound Cake: Fold in semisweet or dark chocolate chips into the batter for a decadent treat.
- Cocoa Powder Pound Cake: Replace a portion of the all-purpose flour with cocoa powder for a rich chocolate flavor. Ensure you adjust the amount of liquid ingredients to compensate for the added cocoa powder.
- Chocolate Swirl Pound Cake: Divide the batter into two bowls. Melt chocolate chips or cocoa powder with a little bit of milk or butter to create a chocolate batter. Gently swirl the chocolate batter into the vanilla batter before pouring it into the prepared pan.
Fruity Infusions:
- Blueberry Pound Cake: Fresh or frozen blueberries can be gently folded into the batter. Ensure the blueberries are well-coated in flour to prevent excessive sinking.
- Strawberry Pound Cake: Similar to blueberries, chopped fresh strawberries can be added to the batter for a burst of fruity flavor.
- Dried Cranberry Pound Cake: Dried cranberries offer a tart and chewy contrast to the moist cake. Chop the cranberries before incorporating them into the batter.
Special Techniques: Taking Your Two-Step Pound Cake to the Next Level
Sour Cream Pound Cake:
For an extra moist and rich pound cake, consider adding sour cream to the batter. The tanginess of the sour cream also complements the sweetness of the cake beautifully. Substitute about half of the milk in the recipe with an equal amount of sour cream.
Bundt Cake Decorating Tips:
When it comes to decorating a Bundt cake, the beautiful fluted design already adds a touch of elegance. However, you can further enhance its presentation:
- Powdered Sugar Dusting: A simple dusting of powdered sugar creates a classic and elegant look.
- Fresh Fruit and Berries: Arrange fresh fruit or berries on top of the cooled cake for a vibrant pop of color.
- Chocolate Shavings: For a decadent touch, sprinkle chocolate shavings over the top of the cake. You can use a chocolate bar shaved with a vegetable peeler or purchase pre-made chocolate curls.
Loaf Cake Presentation:
Loaf cakes offer a versatile canvas for presentation as well. Here are some ideas:
- Simple Glaze: Drizzle a classic powdered sugar glaze, lemon glaze, or chocolate glaze over the cooled cake for a touch of sweetness and shine.
- Dusting of Powdered Sugar: Similar to Bundt cakes, a dusting of powdered sugar creates a simple yet elegant finish.
- Chocolate Sauce and Fresh Berries: Warm up some chocolate sauce and drizzle it over the cake. Top it off with fresh berries for a delightful combination of flavors and textures.
Fricassee Cake Recipes: Savory Baking Redefined
Two-Step Pound Cake for Gifting:
A homemade two-step pound cake makes a thoughtful and delicious gift. Here are some tips for wrapping and storing it for gifting:
- Cooling Completely: Ensure the cake is completely cool before wrapping to prevent moisture condensation.
- Tight Wrapping: Wrap the cake tightly in plastic wrap to prevent it from drying out.
- Aluminum Foil Protection: For an extra layer of protection, wrap the plastic-wrapped cake in aluminum foil.
- Decorative Touches: Get creative with the presentation! Tie a decorative ribbon around the wrapped cake or add a personalized tag with a heartfelt message.
- Storage Considerations: If you’re gifting the cake the same day it’s baked, you can store it at room temperature. For longer storage, wrap it tightly and freeze it for up to 3 months. Advise the recipient on proper thawing instructions (in the refrigerator overnight).
Troubleshooting Common Problems: Conquering Cake Dilemmas
Baking is a science, and sometimes even the best bakers encounter challenges. Here are some common problems you might face while baking a two-step pound cake, along with solutions:
- My cake is too dense/heavy, how can I fix it?
There are a few reasons why your cake might be too dense:
* **Overbaking:**  Check the cake for doneness a few minutes before the recommended baking time. Overbaking can dry out the cake and make it dense.
* **Using cold ingredients:**  As mentioned earlier, room temperature ingredients are crucial for a light and fluffy cake.
* **Overmixing the batter:**  Overmixing can develop the gluten in the flour, leading to a tough and dense cake. Mix the batter just until the ingredients are combined.
- My cake cracked on top, what went wrong?
A few factors can contribute to a cracked cake:
* **Overmixing the batter:**  As discussed previously, overmixing can cause the cake to rise too quickly and then crack on top.
* **Uneven baking temperature:**  Ensure your oven temperature is accurate and consistent throughout the baking process.
- The cake stuck to the pan, how can I prevent this?
Here’s how to ensure your cake releases easily from the pan:
* **Proper greasing and flouring:**  Don't skimp on this step! Generously grease the pan and coat it with flour for a non-stick surface.
* **Letting the cake cool completely:**  Resist the urge to cut into a warm cake. Allow it to cool completely in the pan before attempting to remove it. Running a thin knife around the edges of the cake can help loosen it from the pan.
- My cake turned out dry, what caused this?
A dry cake can be a result of:
* **Overbaking:**  Once again, keep an eye on the cake during baking and remove it from the oven as soon as it's done.
* **Using not enough butter:**  Butter adds moisture and richness to the cake. Double-check the recipe to ensure you used the correct amount.
- Can I save a burnt cake?
Depending on the severity of the burn, there might be ways to salvage your cake:
* **Minor Burning:**  If only the top of the cake is slightly burnt, you can carefully slice off the burnt layer to reveal the moist cake underneath.

* **Moderately Burnt:**  For a more extensive burn, you might be able to cut away the burnt portions and use the remaining cake for a trifle or crumble dessert.
However, if the cake is severely burnt throughout, it’s best to start over.
Conclusion
By now, you’re well-equipped to embark on your two-step pound cake baking journey. Remember, the key to success lies in using room temperature ingredients
2 thoughts on “Two-Step Pound Cake”